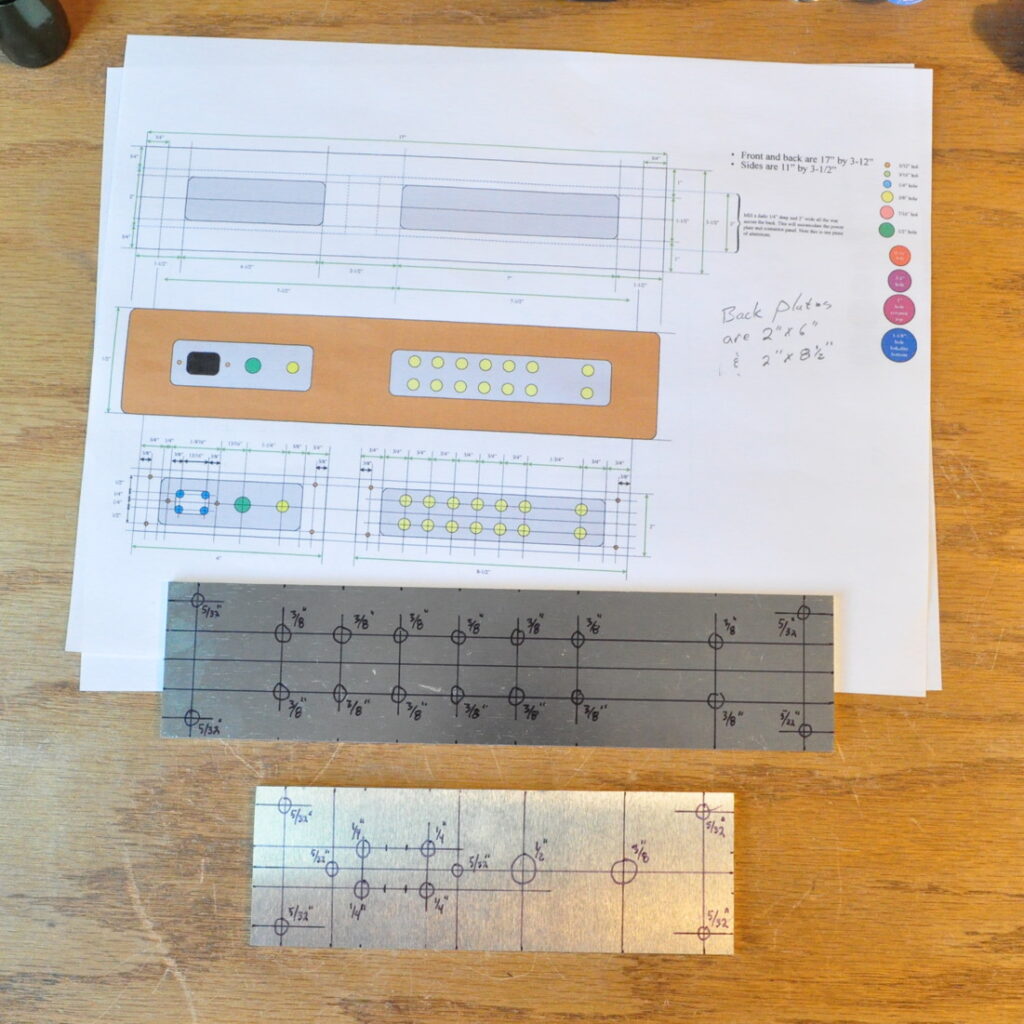
Before I perform the chassis glue up, I decided I wanted to get the two pieces of metal for the back drilled. This means I can make the pilot holes for the mounting screws in the inside of the back without having to work with a drill inside the glued up chassis. It’s a little thing but it makes the first assembly go that much smoother.
At first, I was going to make a single piece of metal bridging both openings for the back. However, after looking through all my scrap pieces of 6061 aluminum plate, I decided I could make better use of my scrap if I separated it into two pieces. So that’s what I did.
This type of quick redesign happens to me all the time. I like to get the maximum use out of my materials. Especially the wood and aluminum plate, both of which are expensive. Making one piece of metal all across the back would have required me to cut into a new 24″x48″ sheet of aluminum. But by separating it into two pieces I could use metal from my scrap pile with very little loss.
Now I need to spend some time at the drill press to finish up these two pieces. I won’t cut the top and bottom plates until the wood chassis is complete. Sometimes chassis end up slightly out of square. Not much, by a 1/16″ (1mm to 2mm) or so. By waiting to cut the top and bottom plates I can ensure that they fit the chassis perfectly. No one would ever notice the slightly out of square chassis, but the uneven gaps around the top metal would really stick out.
As always, questions and comments are welcome.


I am a big believer in reusing scarp. A lot of my aluminum plate comes from leftovers of something else that was fabbed. I do the same thing with wood and tubes. My last guitar amp reused parts, like the alnico speaker, from an old AM radio. In the same way, any time you upcycle things you are going to get scratches and gaps. I actually prefer this real antique look for things that will be daily drivers. Thanks for sharing about your project choices.