I actually spent a fair amount of time thinking about how to dress the chassis edges for the Source Selector Unit. But after much deliberation, a couple of scrap tests, and some evolution in thought as it progressed, I believe I’ve found a solution I really like.
My first decision was the easy one. Between sharp edges, round overs, and chamfers, I decided that it had to be uniform. No mixing the styles of edge treatments. This pretty much ruled out leaving everything sharp as I had already decided I didn’t really like that option.
I thought seriously about chamfers. This would stick with the more modern style to match the other equipment with which it will be colocated. Additionally chamfers are an edge treatment I really like on metal work. But, in the end, I decided that the strong straight lines left by chamfering would not play well with the flowing lines of the figure in the bubinga. I didn’t want that much contrast between the physical and the coloration.
This left doing round overs. But I did really want to preserve some of that clean look that the chassis exhibited with its sharp edges. So I decided the chassis would get a mix of round overs of varying radius.
The first step was to give the outside corners of the chassis a very fine round over of only 1/16″ (≈1.6mm). This is enough of a round over to keep the finished corners looking nice but still give the impression of a more modern form for the overall chassis. Just enough softening of the hard edges to give a finished look to everything.
I tried the 1/16″ round over on the control cutouts but I was unhappy with how it framed the controls. So for all the control openings, I increased the round over to 1/8″ (≈3.2mm). This was enough softening to work well with the 1/4″ radius corners in the cutout openings and yet frame the controls in a more clean and modern overall presentation.
This left only the openings for the Vu meters. I had originally thought to just duplicate the 1/4″ (≈6.4mm) round over I’d used before. However, I was afraid that it would be too stark a contrast to the treatment on the control openings. So I decided to split the difference and pulled out a 3/16″ (≈4.8mm) round over bit which I had never used before. This bit did two things for the overall look. First, it preserved that “wood flowing into the meters” look that I liked so much on the Purpleheart Signal Meters. Second, it preserved the step transition size between edges, control cutouts, and the meter openings.
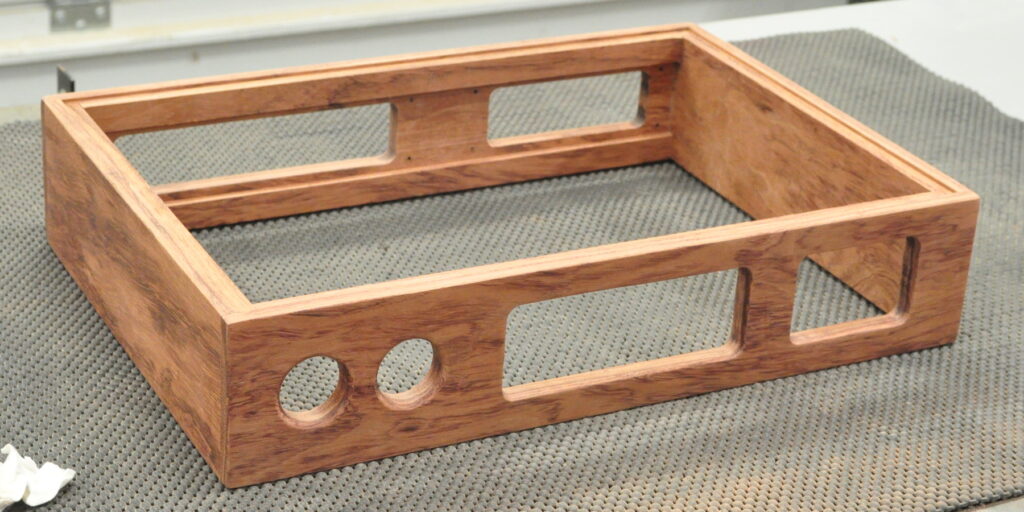
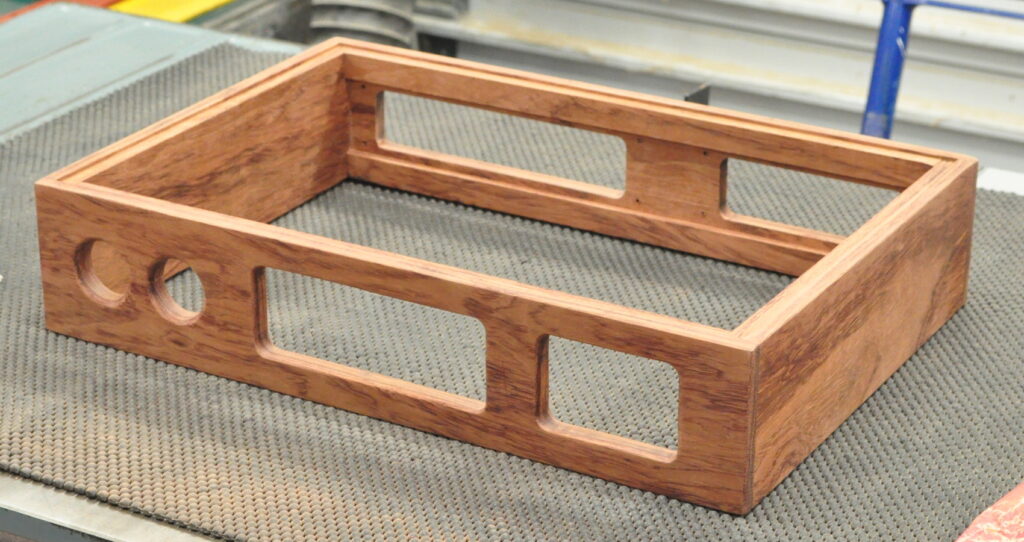
With everything in place this mix of the three different round over radii gave a very unified look to the styling of the chassis. It still preserved the more modern feel I decided I wanted but it also works very well with the flowing, organic feel of the bubinga grain patterns. The addition of several coats of penetrating oil will really bring this chassis to life.
Here is how the chassis looks with all the various round overs in place.
I still have bunch of finish sanding to do before I start applying the oil finish. And I still need to fit the top and bottom plates to the chassis. Once I do these two things I’ll start on the metal working and then the final finishing of both the wood and metal. After this little pause, it feels like the project is moving forward again.
As always, questions and comments are welcome.


good for you Matt:
It looks great already, like you said once it gets a coat or two of penetrating oil it will be stellar. Your consistent approach to the edge treatment was the way to go. Too many types does not lead to a pleasing presentation. Also by sticking to the round over presentation it falls in line with your other projects and looks like it is part of the larger family, albeit a slight departure. Developing a theme and style is challenging and I think you are most of the way there.
Well…I was going to suggest a slight softening in the blog post a few back. I might have done it by hand with a plane or sanding block. I like the radius on the meter windows. About perfect.
Let’s call it the Round Over Hat Trick!
I do have my playoff beard.